Post by Angie on Aug 1, 2010 10:46:15 GMT -5
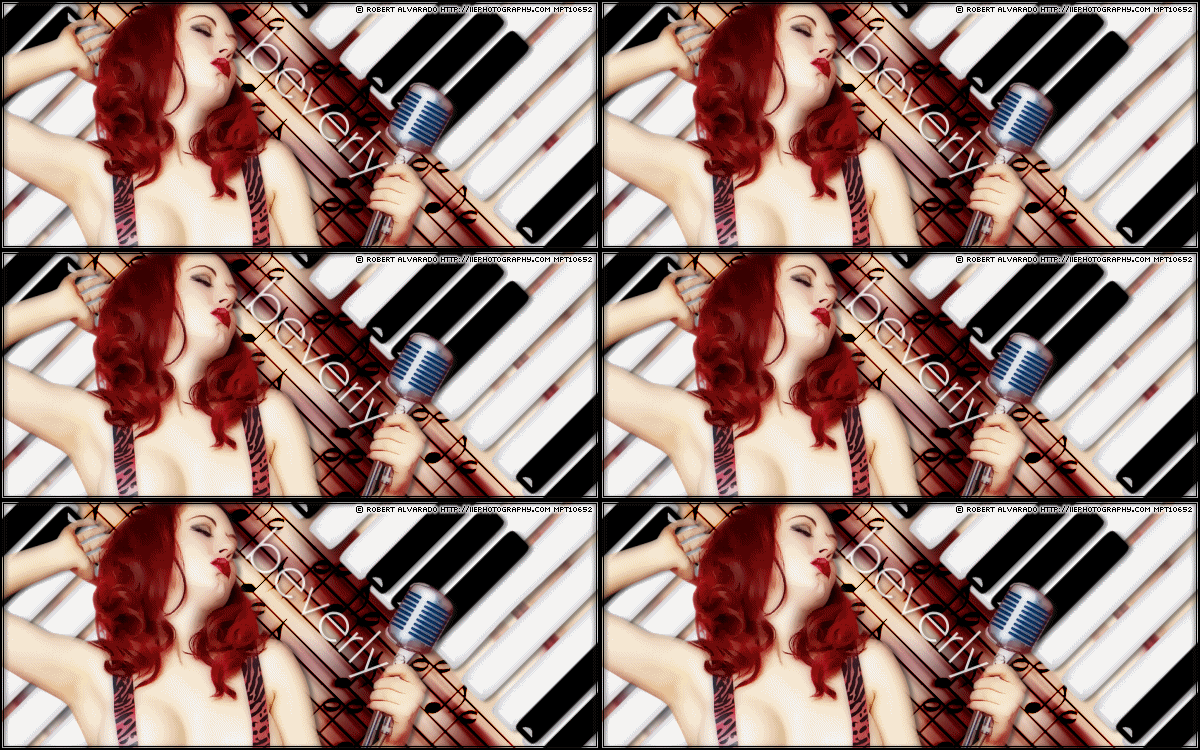
I'm using the art of Robert Alvarado.
In order to use his art you must purchase a license from Mypsptubes
You need a tube & font of choice.
A music notes brush, or music dingbat font
Mura Meister copies
Xero Porcelain (optional)
Eye candy Impact Glass
Open a 600x250 image
We're going to make the keyboard first
Preset shape tool, rounded rectangle,
Foreground Null, background white, draw a thin rectangle.
Convert to raster layer.
Mura copies, Line.
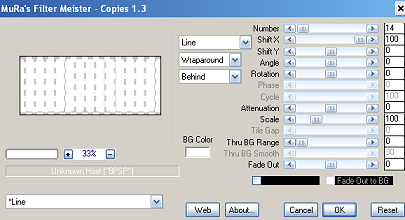
Eye Candy Impact glass, choose clear, no drop shadow, bevel profile button.
Draw another round rectangle, this time smaller & thinner, black
Apply Impact glass, same as before
Mura copies line.
With your selection tool draw round the black lines you don't want, delete.
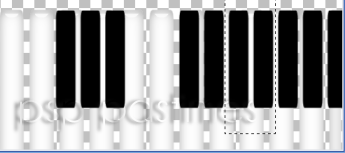
Rotate your white keys 45 degrees right.
Duplicate, mirror, flip, merge visible.
Add a drop shadow on NEW layer, if you don't do this the animation will be difficult
Hide these layers & repeat for the black keys
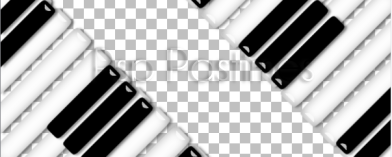
Unhide the white keys, you should now have something like this.
Paste your tube, move layer to bottom.
Mura copies, wallpaper rotate.
Blur motion blur angle 315, strength 100.
New raster layer, apply your music brush or music text in black, rotate so it fits between the keys.
Layer properties set to Burn.
Paste your tube, position to the left,
Apply Xero Porcelain, blue to zero, add a drop shadow.
New raster layer, floodfill black, click inside with your magic wand.
Selections contract by 2, delete.
Selections contract by 2, floodfill black, contarct by 1, delete.
Add a drop shadow.
Animation
Highlight your White keys layer
1 Freehand selection tool, draw round the first key
2 Effects, Distortion effects Pinch
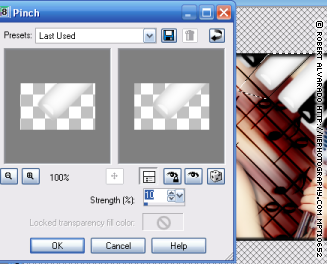
3 Select none, copy merged & take to animation shop
4 Paste as new animation
5 Back to Psp, undo select none, pinch,& freehand tool
Repeat steps 1-5 pasting after current frame until you've done all the keys you want.
Edit, select all, Copy. Animation, reverse frames
Paste after current frame Set the frame speed to 15
That's it, hope you enjoyed
