
Post by Angie on Feb 17, 2011 14:59:32 GMT -5
I'm using the art of Ismael Rac.
To use the same image you must purchase a license from his store Here
You need a tube & font of choice, I used Bank Gothic Light & Inspiration
Filters Unlimited 2
Open a 600 x 250 image floodfill white.
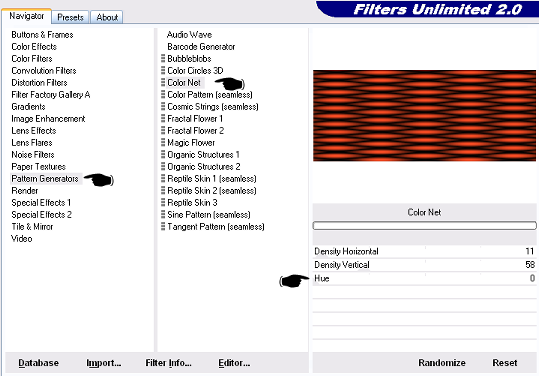
Apply Filters Unlimited 2 Pattern generator Color net,
choose a Hue to suit your tube
Rotate 90 degrees left, duplicate twice & position to fill the image.
Merge visible.
Duplicate, set the bottom layer properties to soft light
& the top layer to Burn.
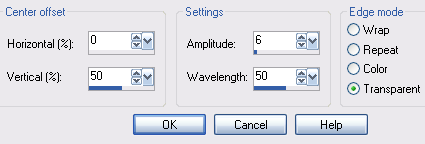
On the top layer Effects, Distortion Effects Ripple.
Draw a narrow white rectangle & position at the bottom of the image.
Change the layer properties to Soft light
Paste your main tube & position to the left,
paste your second tube & position right, change the layer
properties of the second tube to Luminance legacy & reduce opacity to about 50%.
Add drop shadows to your tubes.
Add the text Hot hot Hot & place where you want it, add a drop shadow.
New raster layer, floodfill black, click inside with your magic wand.
Selections modify, contract by 1, edit cut.
Selections modify contract by 1, floodfill black, selections modify by 1 edit cut.
Select none.
Add your name & copyright.
Highlight your white rectangle layer
Copy merged & take to Animation shop, paste as new animation.
Pick tool ( if using psp8 or 9 it's the Raster deform tool )

You may not have placed your rectangle in the same spot as me,
so With your pick tool alter the setting by - 30
i.e if your start number is 230, change it to 200.
Copy merged & take to AS, paste after current frame.
Repeat altering the Y setting by -30 each time
I had 10 frames, depending on the size & position of your rectangle
you may have more or less than me.
Just keep running the animation until you're happy with it, then you're done.
Hope you enjoyed